You are on a product page. One click opens a panel on that page so you can pick photos, edit the details, and save into your library. No copying the URL, no switching tabs.
The clipper is in early access. Right now you install it by hand. It takes about five minutes, and you only do this once. When our listing on the Chrome Web Store is approved, this manual step goes away.
Why it beats pasting a link
When you paste a URL, a server has to go and fetch that page, and some retailers refuse. When you clip, the page has already been fetched by your browser: scripts ran, you were signed in if you needed to be, and nothing blocked you. The clipper sends that rendered page over, so it reads cleanly on sites that a pasted link struggles with.
A clip still reads the page with AI, so it draws on your shared monthly AI allowance like any other import. What it saves is the fetch, not the reading: a page your browser already loaded does not have to be fetched again, which is why clipping works on sites a pasted link struggles with.
Install it
The clipper is on paid plans. The sandbox can paste a product link. Clipping from a live page needs a trial or a paid plan. Open Products and follow the Clipper link, or go to Install and connect the clipper. It walks four steps.
Download the file
Press Download the clipper on that page. Chrome saves a zip (a packed file) to your Downloads folder. That is the folder on this computer where new downloads go. Look there if you cannot see the file.
Unzip it
You must unzip it. This is the step people miss. Chrome cannot use the zip itself. If you skip this, Chrome shows an error that does not explain why.
On Windows: right-click the zip, then Extract All, then Extract.
On a Mac: double-click the zip.
You should now have a folder with the same name as the zip, sitting next to it. That folder is what Chrome needs.
Open Chrome's extensions page
Open a new tab. Click the address bar (the box at the top where website addresses go). Type
chrome://extensions and press Enter. Do not search for it. Searching will not open the right page.
Browsers also block links to that address, so a button cannot take you there.
Turn on Developer mode
Developer mode is the switch that lets Chrome load an add-on from a folder on your computer. It sits at the top right of the page. It is easy to miss.
Load the folder
Press Load unpacked. That is Chrome's name for "load from a folder on this computer." In the picker, choose the unzipped folder. Not the zip. Not a file inside the folder. On Windows the button in the picker reads Select Folder.
Pin it
Click the puzzle-piece icon (the small jigsaw to the right of the address bar), find Clip to Spec Sheet Builder, and press the pin.
If the clipper stops working after a restart
Read this before you restart Chrome. Because this is a hand-installed add-on, Chrome shows a "disable developer mode extensions" warning when it starts. Close that window. Chrome can also switch the clipper off after a restart. If the clipper icon vanishes, that is normal, not broken. Click the puzzle-piece icon, open Manage extensions, and switch it back on. When the listing is approved, both of those stop.
Get a token
A token is a secret string, not your password. The clipper uses it to add products to your library.
Generate it on the clipper page, or in Settings, Browser clipper.
The token is shown once. Copy it before you click Generate token. If you leave without copying, you will have to make a new one.
Connect the extension
Right-click the pinned clipper icon, then press Options. If you do not see Options, click the puzzle-piece icon, then the three dots next to Clip to Spec Sheet Builder, then Options.
Paste the token into Clipper token. The app address is already filled in. Leave Using a local app? closed. Press Test connection. You should see Connected. Your token works.
Go back to the clipper page. Confirm it is connected turns green on its own, without a reload.
Tokens
One active token per account. The token is what authenticates the extension, so treat it like a password: it is not your login, but anybody holding it can write products into your library.
Rotate or revoke it any time from Settings, in the Browser clipper section. Rotating replaces the token, which disconnects any browser still using the old one.
What gets saved
The same fields as any other import, in the same suggested folder. Products saved this way are tagged with where they came from, and keep their source link.
What a clip looks like
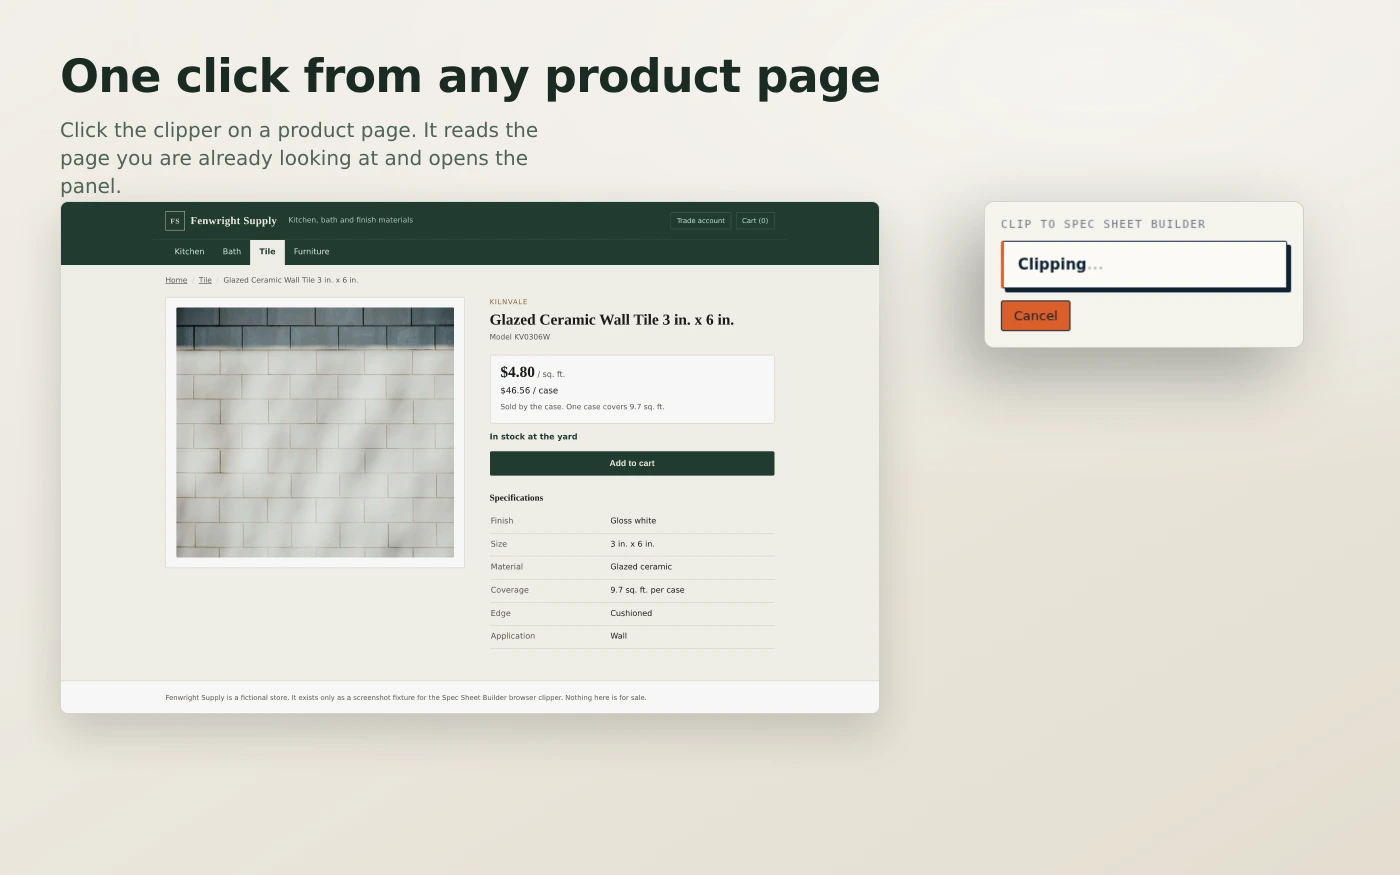
Open a product page and click the clipper. It reads the page you are already looking at, so there is nothing to paste and nothing to wait for.
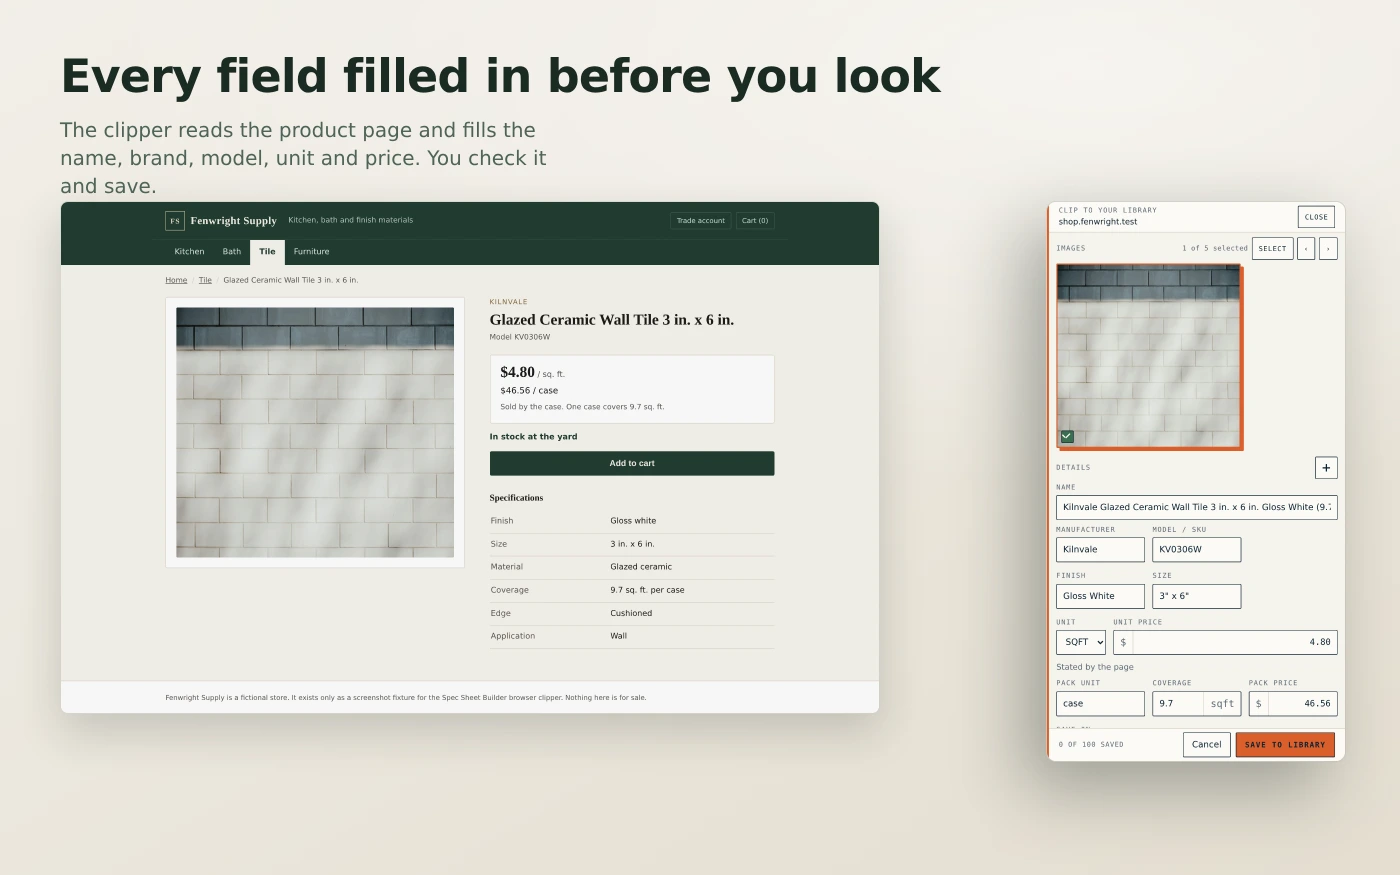
The panel opens beside the page with the details already filled in: name, brand, model, unit and price. Where a page sells by the case, the coverage and the case price come across too, and the unit price is worked out from them.
Picking images
Clicking the toolbar button opens a panel on the product page. It lists the photos the clipper found. Tick up to five, mark one as the cover, and save. Photos under 600 pixels on the short side show a low resolution note so you can skip them.
If no photos are found you can still save the product and add a photo later in the library.
The clipper still only sees the page you are on, and only when you click. It does not ask for extra permissions.